Contents
Expense Object
Create an expense object to store your expense records and data for the app.
- From Setup, click Create > Objects.
- Click New Custom Object.
- Fill in the custom object definition.
- For the
Label, enterExpense. - For the
Plural Label, enterExpenses
- For the
- Click Save to finish creating your new object. The Expense detail page is displayed.
- Check that the API Name for your object is
namespace__Expense__c, where namespace corresponds to your registered namespace prefix.
- Check that the API Name for your object is
- On the Expense detail page, add the following custom fields.
| Field Type | Field Label |
|---|---|
| Number(16,2) | Amount |
| Text(20) | Client |
| Date/Time | Date |
| Checkbox | Reimbursed? |
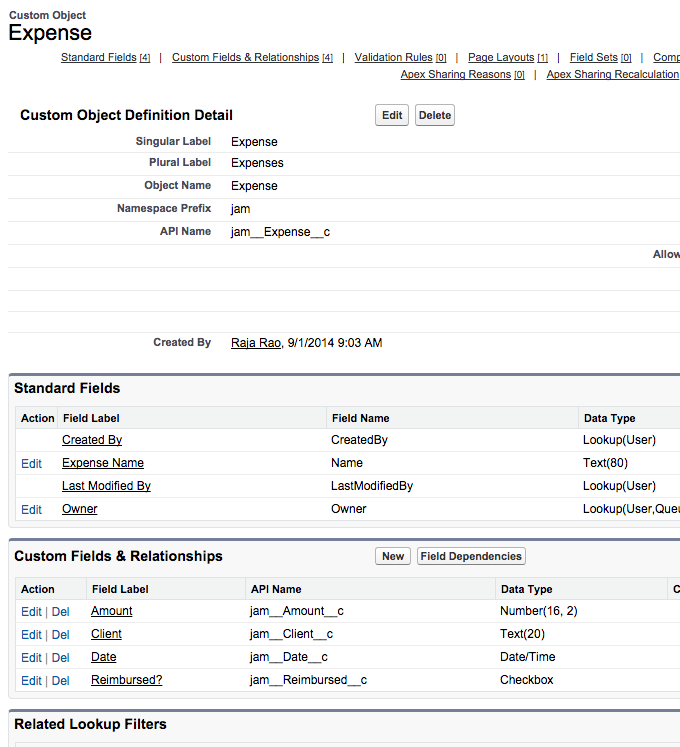
When you finish creating the custom object, your Expense definition detail page should look similar to this.

Note "jam" in the screenshot is just a namespace prefix. Your's will be different.Custom Tab
Create a custom object tab to display your expense records.
- From Setup, click Create > Tabs.
- In the Custom Object Tabs related list, click New to launch the New Custom Tab wizard.
- For the Object, select
Expense. - For the Tab Style, click the lookup icon and select the
Credit Cardicon.
- For the Object, select
- Accept the remaining defaults and click Next.
- Click Next and Save to finish creating the tab.
- You should now see a tab for your Expenses at the top of the screen.
- Create a few expense records.
- Click the Expenses tab and click New.
- Enter the values for these fields and repeat for the second record.
| Expense Name | Amount | Client | Date | Reimbursed? |
|---|---|---|---|---|
| Lunch | 20 | 4/1/2014 12:00 PM | Unchecked | |
| Text(20) | Client | ABC Co. | 4/1/2014 12:00 PM | Checked |